UPDATING YOUR PRODUCT CATEGORIES
PLEASE COMPLETE ASAP
Product categories and subcategories are applied to your products when you add them to your Store, via manual upload or the Shopify integration. You can add more than one category to each product listing by editing the product details. If you synced your products via Shopify, you can also edit your Product listing and adjust the automatic categories after the sync is done. These categories are used in search results for the Categories drop down menu and as filters on the Brand Directory and Products Page.
In order to make this feature effective for all vendors and shoppers, please ONLY apply categories that directly apply to your products. For example, it might be tempting to add the "Art" category to all of your products, however this tag is meant specifically for Fine Art pieces and applying it your products (ceramics, for instance) will skew the results and created a more challenging shopping experience when customers browse this category looking for Fine Art. Please take some time to assess and adjust your product categories this week to ensure you are using them in the proper and most effective manner for you, your fellow vendors and customers.
One Of A Kind reserves the right to suppress any listings that are using product categories incorrectly.
You can update your categories in one of two ways:
MANUAL
This method works best if you only have a few products to update or if you do not feel comfortable importing and exporting CSV lists.
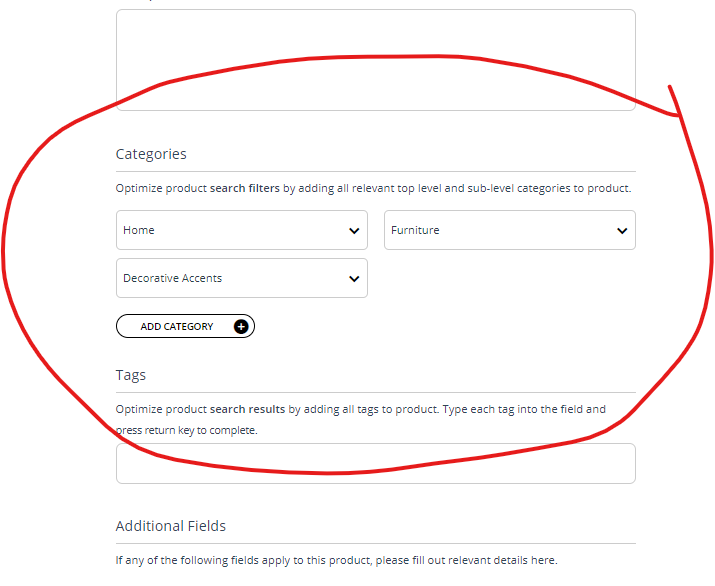
To manually update your products, go to your Store, click each individual product listings and edit your products categories under the Categories field.
BULK IMPORT
This method is best if you have many products you need to update. Click here to see a sample template. If you use this method, here are a few things to keep in mind.
- First, EXPORT YOUR DATA
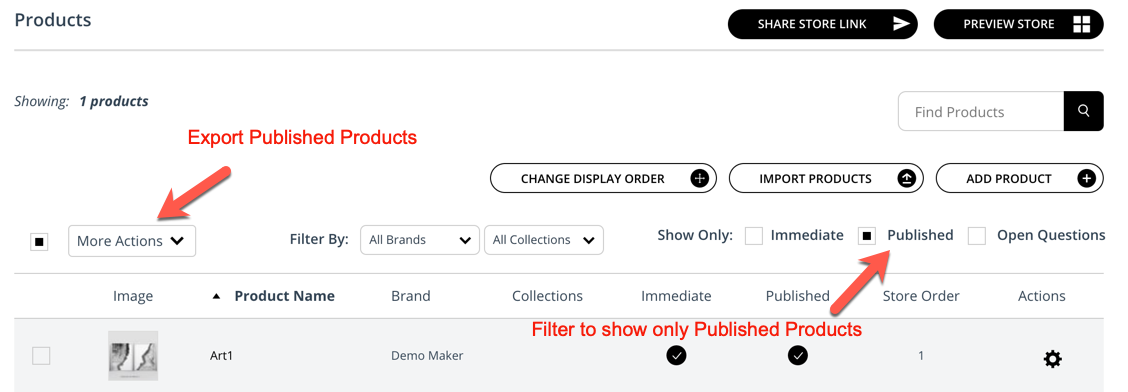
You can do this by going to your Store, filtering to show only your published products and using the MORE ACTIONS menu to select EXPORT ALL PUBLISHED PRODUCTS. Make sure to select only published products, as updating information for unpublished product listings will cause them to be published.
NOTE: You should save a copy of this file of your full product listings, just for back up.
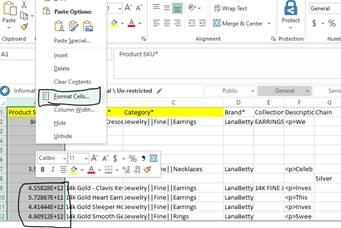
- Once you export the file, make sure your Product SKU column is formatted as number
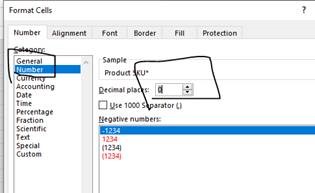
- Longer SKUs, when exported, will show up something in a condensed format, ex. 5789E+12. To ensure that your SKUs are in the right format to reupload, you will need to change the cell format to Numbers. You can do this by selecting the SKU column and right mouse clicking to select FORMAT. Change to format to NUMBER and use the decimal place feature to remove “.00”
- Longer SKUs, when exported, will show up something in a condensed format, ex. 5789E+12. To ensure that your SKUs are in the right format to reupload, you will need to change the cell format to Numbers. You can do this by selecting the SKU column and right mouse clicking to select FORMAT. Change to format to NUMBER and use the decimal place feature to remove “.00”
- Now, delete all columns except the first three--Product SKU, Product Name and Category. Do not make any alterations to the spreadsheet header names or order. If product has variants, you can delete all the extra rows in between as variants do not matter for updating categories. Then make the necessary updates to your Categories for each product.
- Please use this Categories List and copy and paste the necessary categories into Column C. Make sure Categories entered are the exact names as the OOAK Category listing, including the sub-category. If you need to add multiple categories for your product, use “//” as the separator.
- Save the file in a location you can find for upload later, We highly recommend that you save the revised file with a different name so that you have the original file as backup.
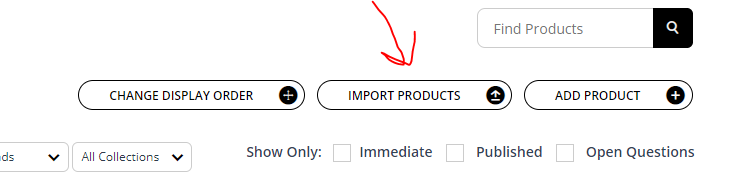
- Once you have your updated spreadsheet, you can re-import your CSV file. Go to your Store, click IMPORT PRODUCTS, proceed to Step 3 and upload your file accordingly.
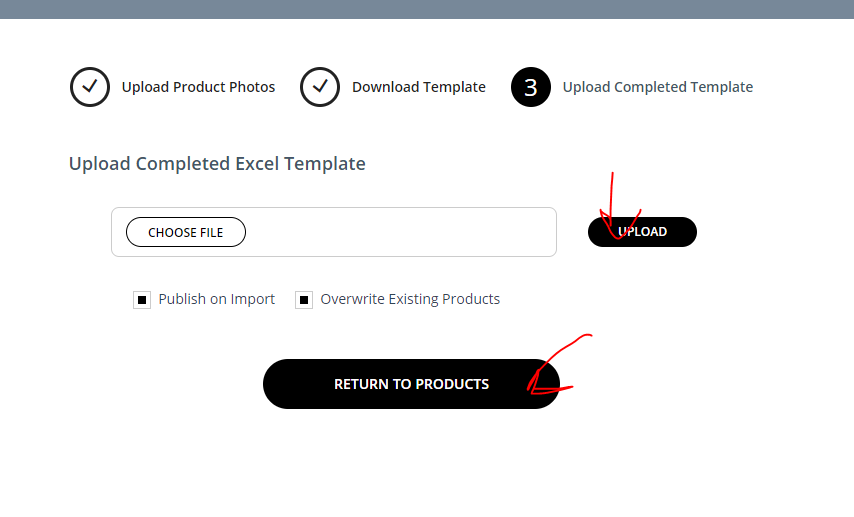
- Once uploaded, your product categories should be updated.