SETTING UP YOUR STORE
SHOPIFY INTEGRATION | SHOPIFY TROUBLESHOOTING
SINGLE PRODUCT UPLOAD | BULK PRODUCT UPLOAD
VARIANTS | CATEGORIES | TAGS
Your OOAK Online Store allows you to upload products to the marketplace and link them to your own e-commerce store, in one of two ways.
1. ON SHOPIFY
One Of A Kind Online comes with Shopify integration, so that you can manage OOAK inventory and sales through your own shop. Your existing product listings will be synced to One Of A Kind Online, including images, product info and inventory. You can add categories, tags and additional details to boost your profile in our site's marketing and search results. And shoppers will be able to add your products to their cart and checkout through your Shopify shop to complete the transaction.
2. NOT ON SHOPIFY
Vendors who sell on other e-commerce platforms will be able to create products individually or upload them in bulk with spreadsheet. Instead of "Add to Basket", product listings will include a "Visit Site to Purchase" button. Vendors can link these buttons out to individual product pages on their own site for shoppers to complete the transaction. Make sure you complete these steps in order to add shopping buttons on your product pages.
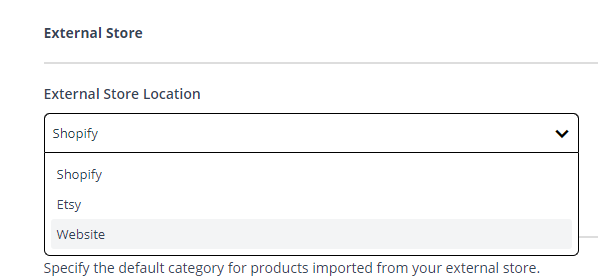
- From your account drop down menu, go to Company Admin > Integrations, select "Website" from the External Store Location drop down menu and add your your e-commerce site URL in the External Store URL field.
- Select the category and sub-categories that best fit your brand, as these will be applied to your product listings by default and will drive the site's search function. You will be able to add or adjust categories as you create your individual product listings.
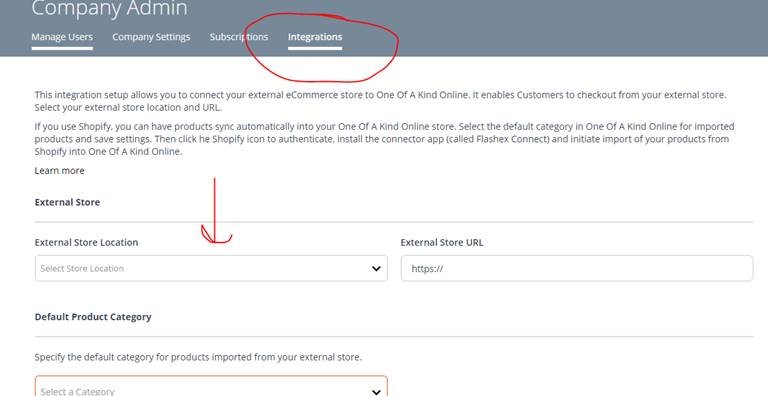
- Then, as you upload products to OOAK Online, make sure to fill in the Product External Link field for each listing to direct shoppers to the product page on your own e-commerce site for purchase.
Products can be manually uploaded in one of two ways:
BETTER YET, WHY NOT JOIN SHOPIFY?
Learn more about how you can get a free trial and the help you need to set up your Shopify shop for OOAK Online with our friends at Shopify and Digital Main Street.
NOT SELLING ONLINE?
If you are not selling online, your product listing page will function more like a catalogue to showcase your products. If a customer wants to buy something from you, they can use the in-system messaging to contact you directly. You can set up your products using the instructions above--just skip over linking to your e-commerce store.
* IMPORTANT NOTE ABOUT THE SHOPPING EXPERIENCE *
Exhibitor accounts will not display the shopping experience on the platform. In order to get the full experience, please sign up for a customer account or you can view the short video below. Note that there will be slight differences in user experiences between those who sell on Shopify vs. those who do not.
SHOPIFY INTEGRATION
With Shopify integration, you will be able to sync your products to OOAK Online so that you can manage inventory and sales from your Shopify shop. This sync is one-way, meaning that changes to your Shopify shop listing will be pushed to your OOAK Online Store. This will happen once, in bulk with your initial integration and then by maintained by webhooks that will trigger listings to update upon certain actions. Since checkout will take place on your Shopify site, no information will be pushed back from OOAK Online to Shopify.
THINGS TO CONSIDER:
- If you need to make lots of changes to your OOAK Online listings, like translated copy, we recommend you complete the initial product synchronization, but avoid installing webhooks as this information will just be overwritten. Fields that should not be overwritten include product categories, tags, published status and whether you chose to track inventory or not. You can also export a copy of your product listings as a backup, so this information is on hand, if needed.
- If you need to synchronize more than 250 products, or only a specific selection of what is available in your Shopify shop, you can fill out this form and we will help facilitate this process.
INTEGRATION SERVICE HOURS
In order to keep the site server optimized for shoppers, the synchronization will only be open for select days/hours each week. If you are having trouble with your Shopify synchronization, please take a moment to read these common troubleshooting solutions. If you do ultimately need to resync your Store, please ensure you only do so during the below times.
THURSDAY: 1-5PM EST
FRIDAY: 1-5PM EST
GET STARTED
Download this Quick Start Guide for an abbreviated walk through the steps of integrating your shop or follow the step-by-step instructions below.
Think you'll need additional help integrating your Shopify Shop? Ontario makers can connect with our friends at Digital Main Street for help navigating the integration process.
Step 1: Set Up Currency and Variants
First, you want to make sure your OOAK Online Store has two important settings in place to transfer information over from Shopify.
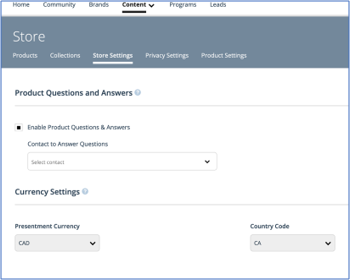
CURRENCY
If you are not using CAD as the currency in your Shopify shop, you will need to update your currency setting in OOAK Online to match. You can do this by going to Store > Store Settings > Currency Settings. If your Shopify shop operates in CAD, no action is required. We also recommend that on each of your product listing page to leave a note so that your customers know you only sell in USD.
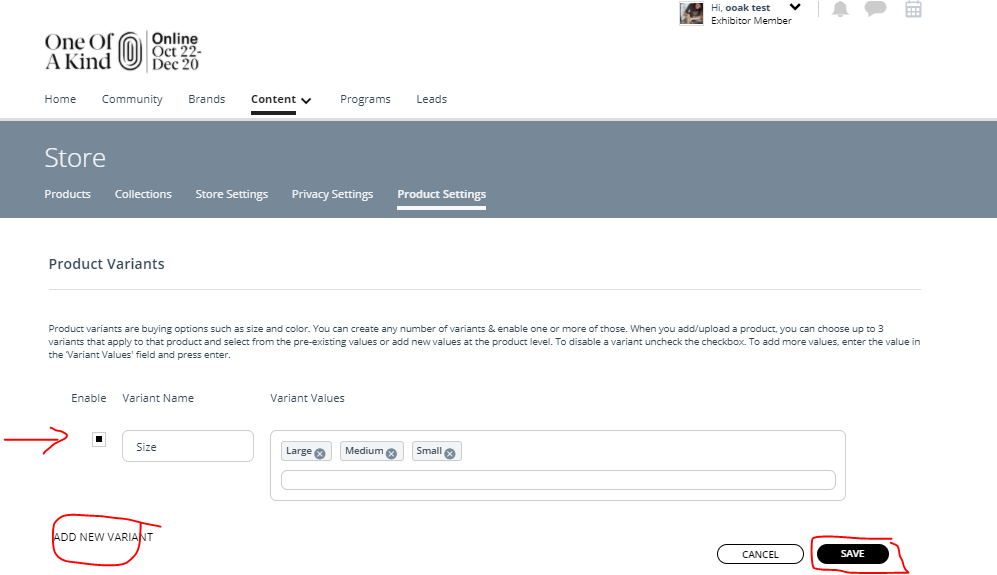
PRODUCT VARIANTS
Variants allow you to apply different variables to your individual product listings, ex. for clothing sizes, "size" would be the variant. Before you can sync your products to OOAK Online, you need to create all of the variants that you use on Shopify so that they can be properly mapped to OOAK Online. To do so, visit Store > Products Settings and click "Add New Variant".
We encourage you to use the list of variants in your Shopify shop as a reference, as they must match exactly in both spelling and capitalization, ex. "colour", "color", Colour". If you have a lot of variants, it might be helpful to export this information from Shopify first for easy inputting on OOAK Online.
Product Variants in Shopify
.png)
Product Variants in OOAK Online
Learn more about Product Variants.
Step 2: Set Up External Store Settings
To connect your Shopify shop, go to your Account drop down menu and select Company Admin > Integrations. Complete the below three steps to begin your initial integration.
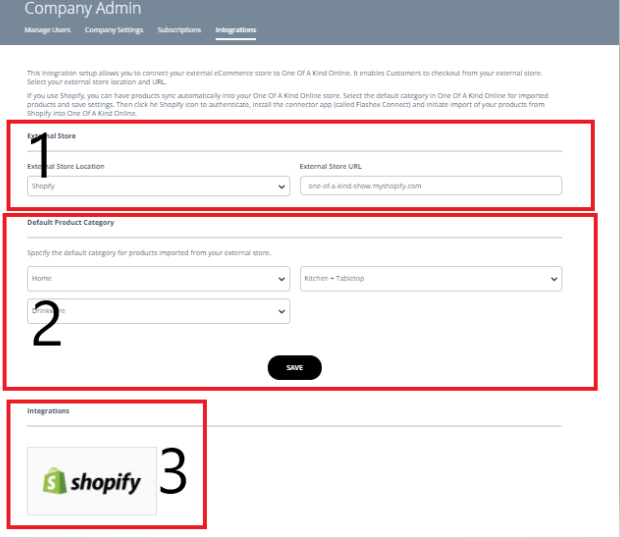
- Select Shopify from the External Store Location drop-down menu and enter your shop URL in the text field. This should be your Shopify URL, not your branded domain, and should not include "www."
- Map your products with OOAK Online's product categories and subcategories. Please select the one that best describe your brand or overall products, as it will be applied to each of your listings by default during the synchronization process. Youl will be able to edit or add more categories to individual listings once the synchronization in complete. Learn more about categories.
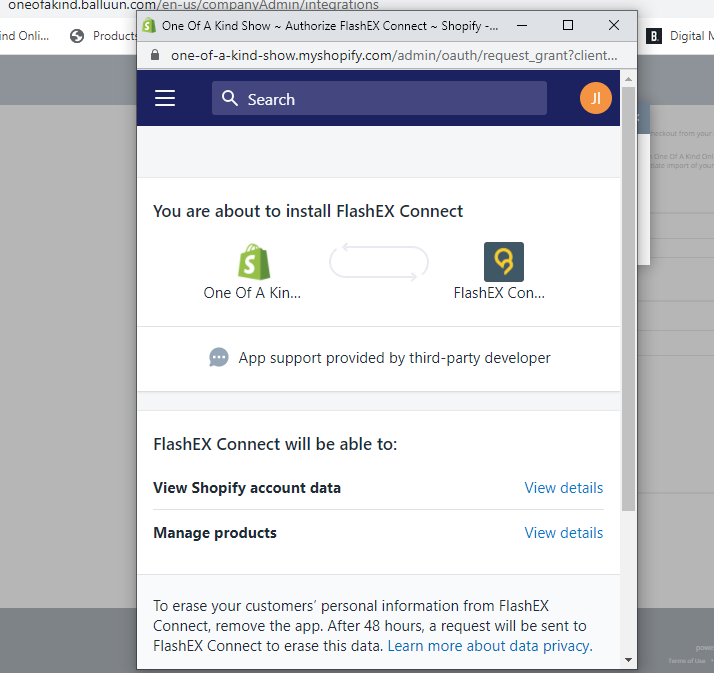
- Finally, click on the Shopify integration button to connect your shop with OOAK Online. Upon clicking on the button, you will be prompted to re-enter the shop name portion of your URL and click CONTINUE.
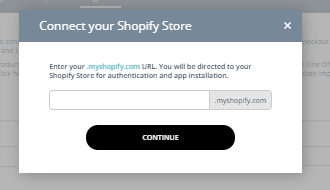
- If you are already signed in to Shopify, you will see the below screen. If you not, you will be prompted to log in.
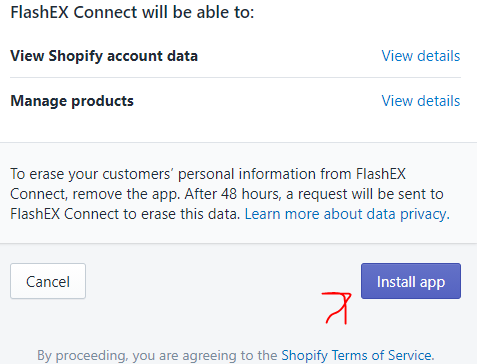
- Scroll to the bottom of the screen, and click INSTALL APP.
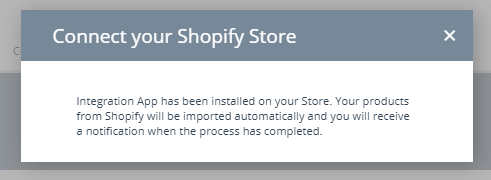
- Once you connect your Shopify shop with OOAK Online, you will see the message below and can close the pop up.
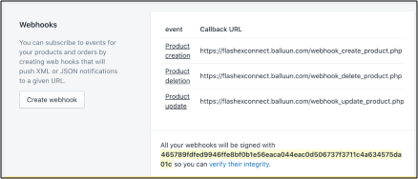
Step 3: Set Up Webhooks
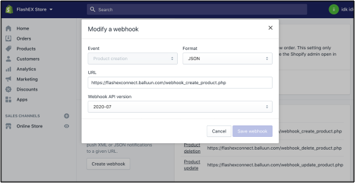
Webhooks are what will allow your products to update on OOAK Online when changes are made to your Shopify shop, including product creation, info updates or inventory changes. To set up your webhooks on your Shopify shop:
- Go to Shopify Store > Settings > Notifications > Webhooks
- Create three webhooks, using the exact Event and URL information below.
- Product Creation: https://flashexconnect.balluun.com/webhook_create_product.php
- Product Deletion: https://flashexconnect.balluun.com/webhook_delete_product.php
- Product Update: https://flashexconnect.balluun.com/webhook_update_product.php
And with that, your product listings should continue to sync to OOAK Online! You can now do any fine tuning, tweaking and additional product tagging to complete your listings.
HAVING TROUBLE WITH YOUR STORE INTEGRATION?
Click here for a list of basic troubleshooting processes and how to report any additional issues.
SINGLE PRODUCT UPLOAD
Adding single products works well when you have a fewer items or you just want to get to know the features of the Product page. If you have a full catalogue of products, we recommend that you use the bulk upload process to make the task much faster and easier.
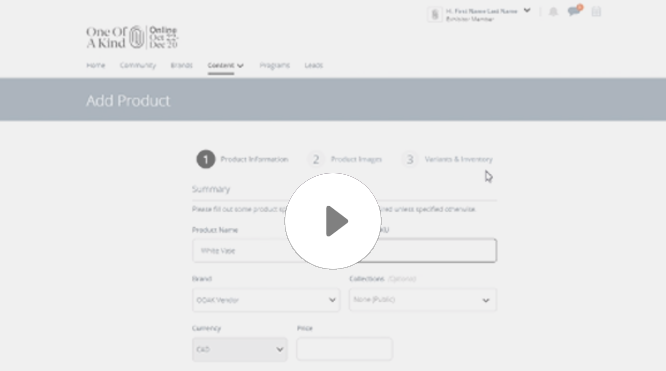
Start by heading to your Store. Click Add Product and fill out all of the necessary information, including:
- PRODUCT NAME
Your products will show up in the search in one of two ways, based on how they are named. First, products containing the search keyword will show up under the Products search results, then any brand selling items with the keyword will show up under the Brand results. So, make sure to create clear and descriptive product names. - CATEGORY
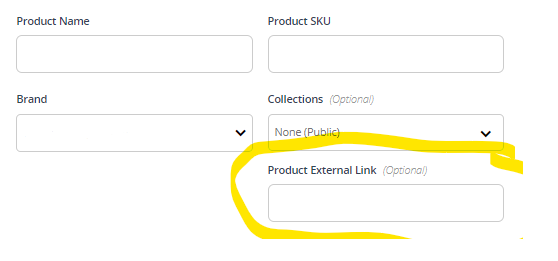
Choose the OOAK categories and subcategories that best describe the product. Learn more about categories. - ** PRODUCT EXTERNAL LINK **
Add a link to your the product pages on your own e-commerce site so that customers can click through to buy the product. If you do not fill this out, your listings will default to the URL in your Integration settings.
- TAGS
Optimize the site's product search results by tagging all relevant keywords and search terms to your product listings. - ADDITIONAL FIELDS
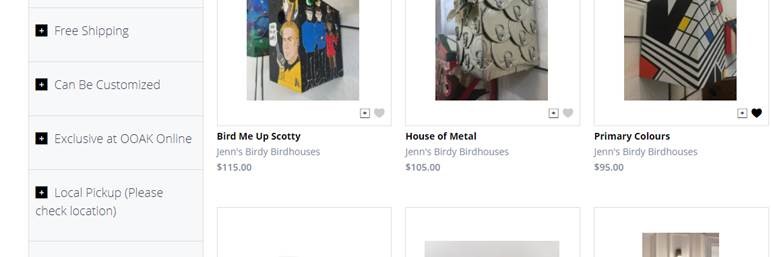
Give shoppers the chance to find your products through filter criteria, like Colour, Gender, Free Shipping, Customization, Exclusive to OOAK, and Local Pickup, when they browse or search the site. ONLY answer these questions if you want to offer these options.
- PHOTOS (800 x 1136 px)
Upload images for each product listing. The first image is the default image and others can include lifestyle shots or colour/style variants. Drag and drop to rearrange them to your preferred order. - VIDEO
Enter a YouTube or Vimeo URL to a video that demos, explains, or showcases the product. Video will be added to the end of the photo stack. Make sure to enter the full browser URL in this field, not the Share link and a shortened link.
OTHER FIELDS
- PRODUCT SKU
This is a unique identifier for products in your Store and will appear on the individual product listing pages. If you do not have existing product SKUs, you can create them for OOAK Online. Note that you cannot reuse the same SKU for multiple products. - PRODUCT VARIANTS
You will also have the ability to create custom lists to use across your products. Use this feature to create a listing for one product with multiple designs. so that you are not managing a million different listings for every pattern, scent, or size you sell. Custom variants can be created in your Product Settings. Learn more about variants. - INVENTORY
Set stock as available immediately and input existing quantities for OOAK Online. Or set items as available for pre-order and enter your shipping dates. - COLLECTIONS
Create collections to link to a group of specific items in your Store. Learn more about Collections. - VISIBILITY SETTINGS
Set to "Public" so that everyone can see your products.
Once you have completed all of the necessary steps, you can click Save and Publish and your new product listing should appear in your Store. You will also have the option to Preview your listing so you can make any necessary changes before you publish. Or you can simply Save your Product listing and return to finish it later.
BULK UPLOAD
Adding SINGLE PRODUCTS works well when you have a few items or you just want to get to know the features of the Product page. If you have a full catalogue of products, we recommend that you use the BULK UPLOAD process to make the task much faster and easier.
The bulk upload process allows you to populate a spreadsheet template with all of the information you will need to create product listings en masse. You should have two things prepared before you start the bulk upload process:
- A Folder with Product Photos for Upload
- A Spreadsheet with Basic Product Info
Once you are ready to begin, head to your edit your Store and click Import Products to start the bulk import process.
STEP 1: UPLOAD PRODUCT PHOTOS
First, you will be prompted to upload product photos for each of the products you are going to import. Product photos should be high-resolution, 300 dpi photos in jpg format. Individual image files should be no larger than 10MB. You can upload multiple photos for each product, and can also add more photos and videos later. You can also skip this step and upload images later, but we recommend you do it here so that you can download a template with the image column populated in the next step.
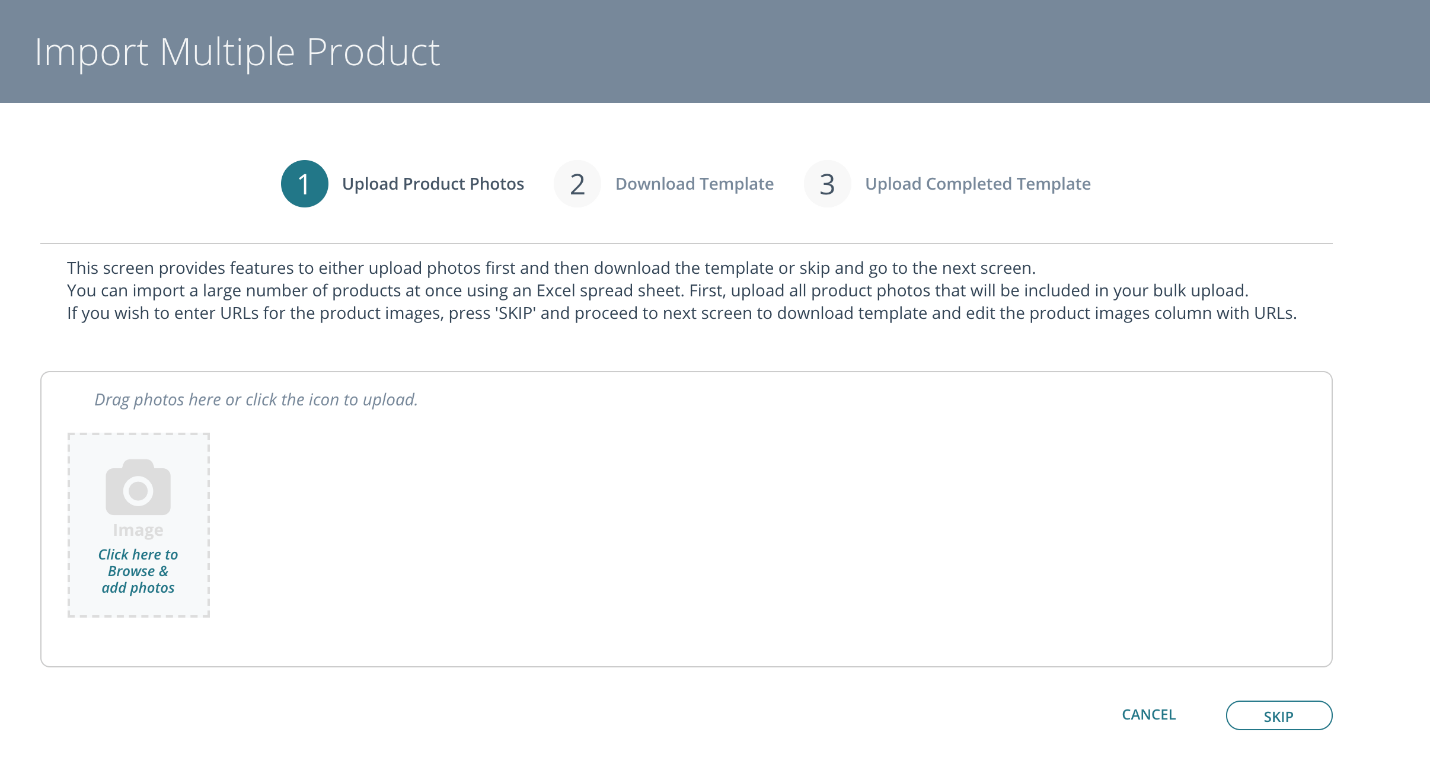
To upload your photos, you can drag-and-drop image files from a folder on your computer or “Click here…” to open a file browser and select products. Select all of the photos you want to upload, using the SHIFT key to select a block of images or the CTRL key to select specific ones.
Once you’ve selected all of the photos you want to upload, click the Open button. You will be able to see upload progress via the progress bars for each image. Once all of the photos have uploaded, thumbnail images for each one will appear on the Photos page.
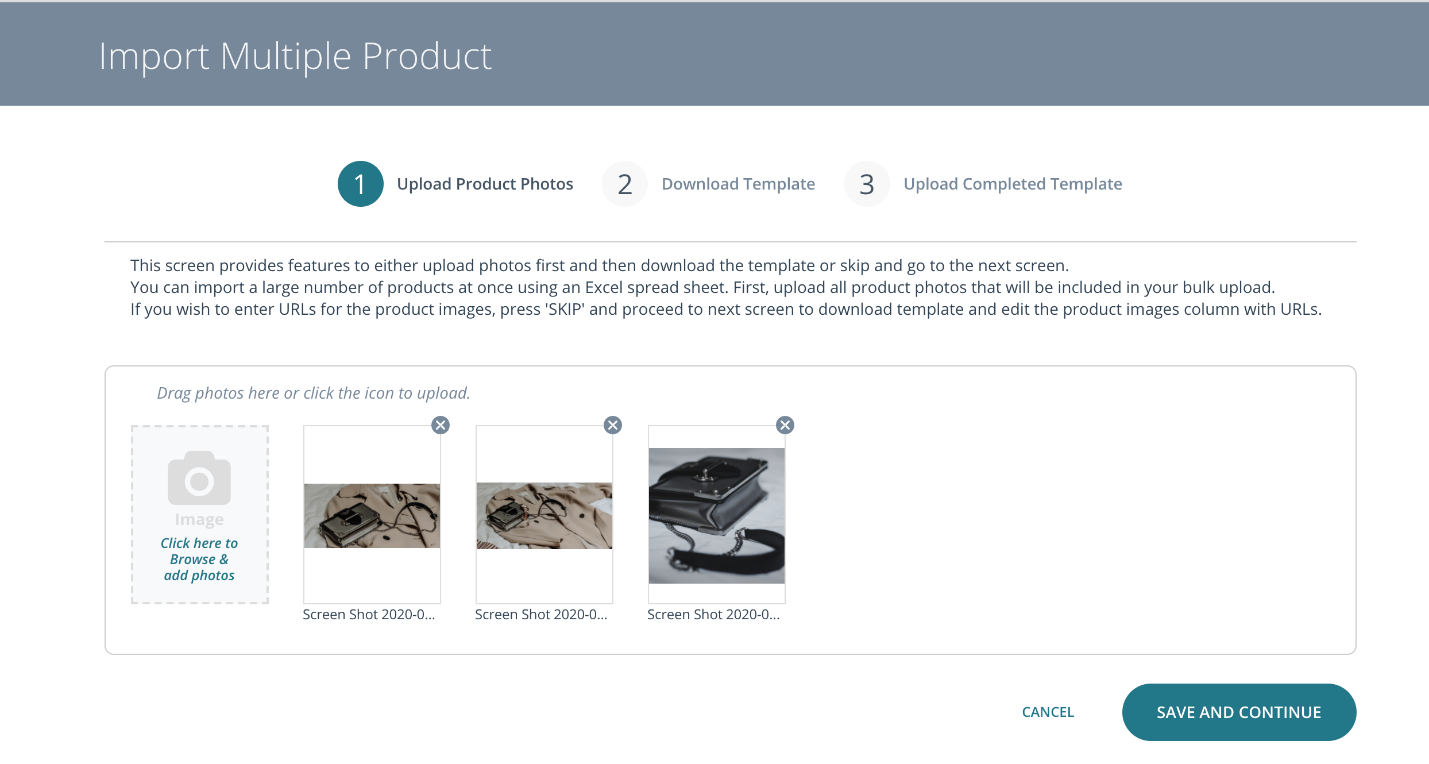
These photos will remain in a temporary library until you add them to your product listings. Once you have uploaded all of your desired images, a “Save & Continue” button will appear to take you to the next step.
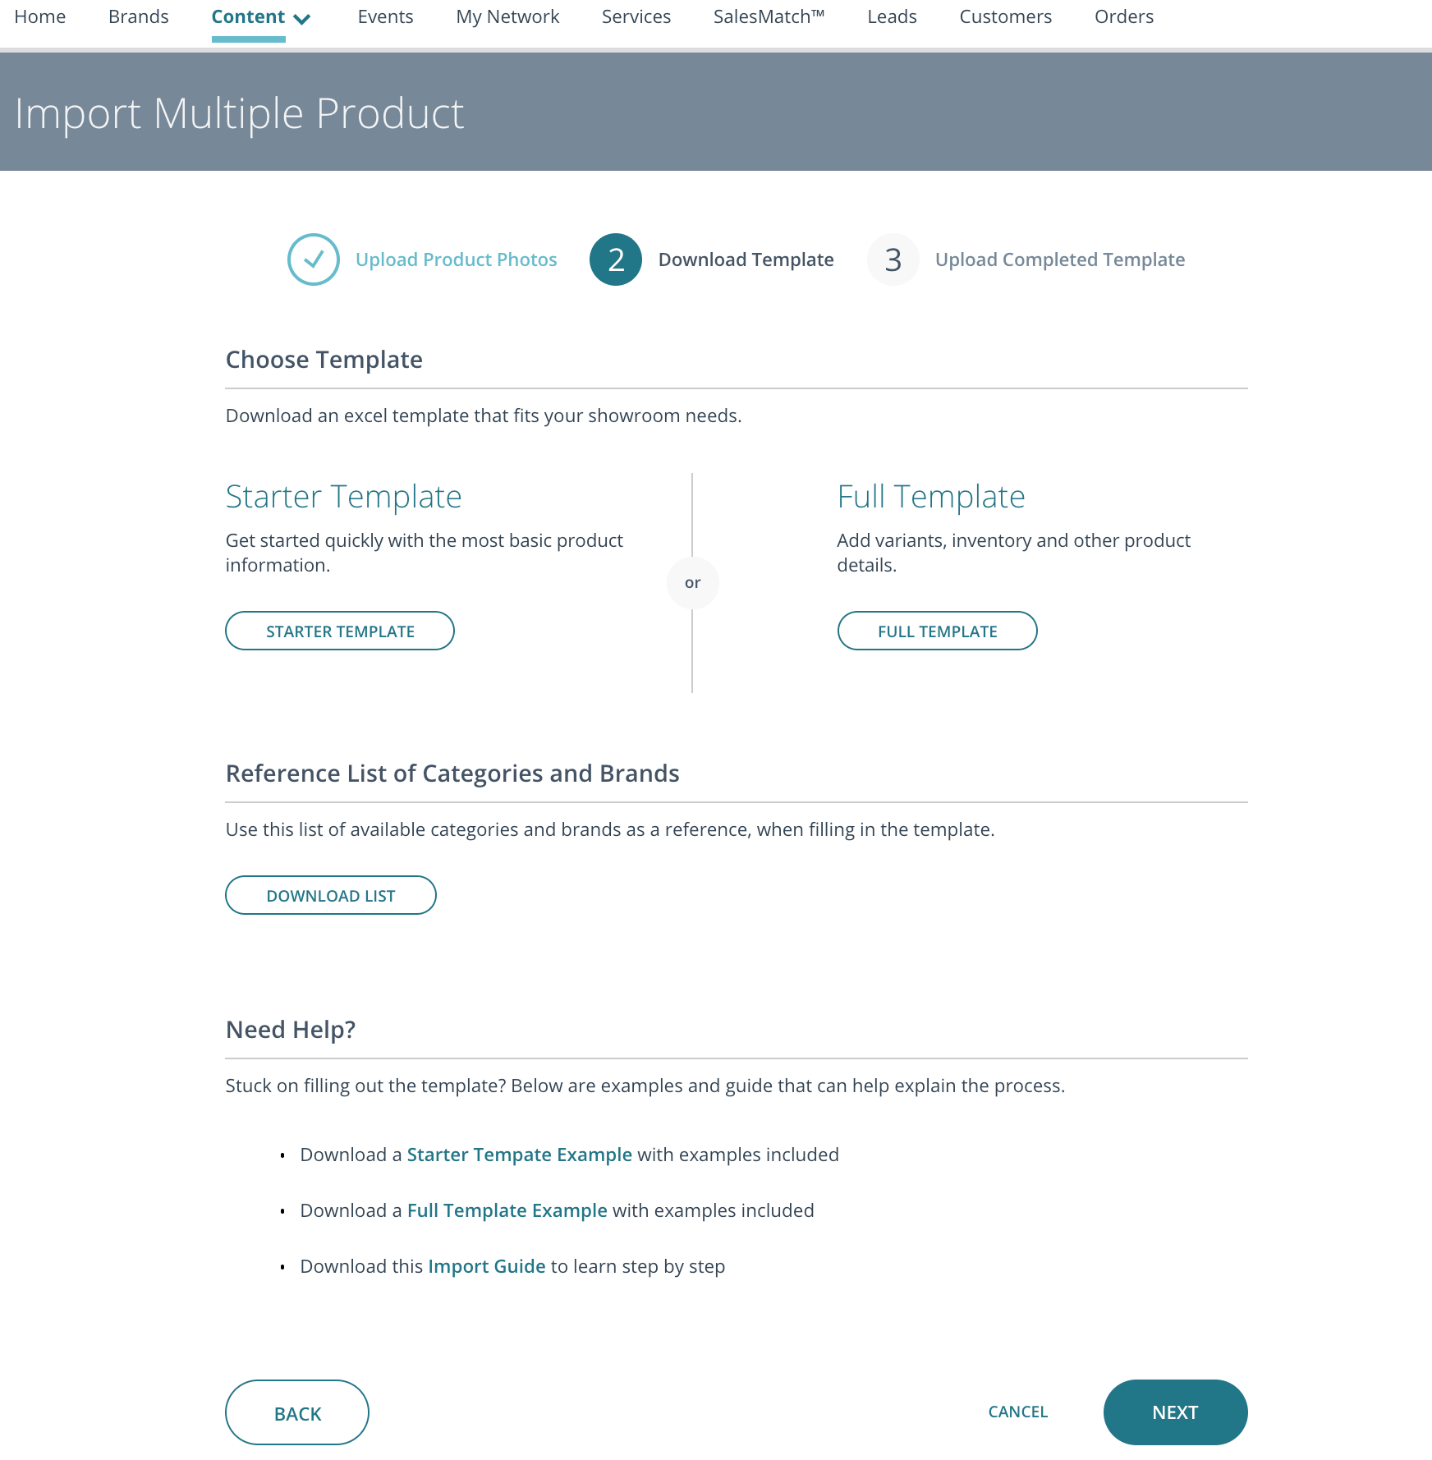
STEP 2: DOWNLOAD AN EXCEL TEMPLATE
Once your photos are uploaded, you will be able to download a template pre-populated with your image file names in the Image 1 column. If you chose to upload photos via a link or will be adding photos later, you can download a blank template at this step instead.
IMPORTANT NOTES FOR YOUR UPLOAD TEMPLATE
- The first row of column headings should not be modified.
- Each row after the column headings should correspond to a single product
- When you download your template, image names for your uploaded photos are pre-filled in the column ‘Image 1’
- If multiple images in the ‘Image 1’ column belong to the same product, move them into one row (‘Image 1’, ‘Image 2’, ‘Image 3’, etc)
- Fields marked with an * are required and a value must be entered.
STEP 3: UPLOAD FILE
Once you have filled in the Excel template and saved it to your computer, you can start the import process by clicking “Choose File”, selecting the file you want to upload and then clicking 'Upload'.
When the import is complete, you will see a summary of how many products were successfully imported and whether there were any rows in the template with errors. Product rows that have errors are not uploaded and any warnings can be ignored. An error description will be displayed with the corresponding row number(s) so that you know exactly where to find it.
Click Download List to re-download your template and make any necessary changes, so that you can import it again. Click Acknowledge to complete your first import process, and begin a new import with your corrected spreadsheet. Any data that has been changed in your spreadsheet will be updated, all other info will remain unchanged. You will not have to import product photos again.
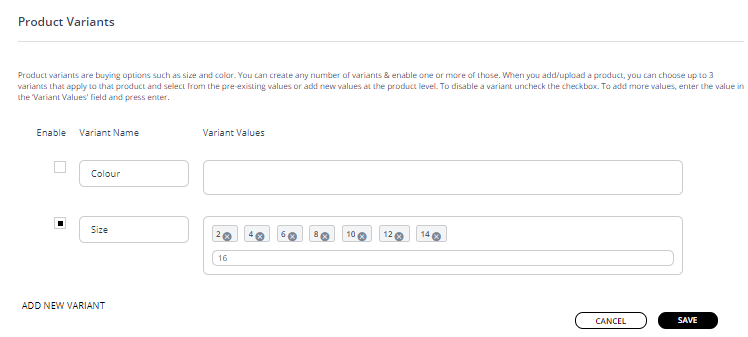
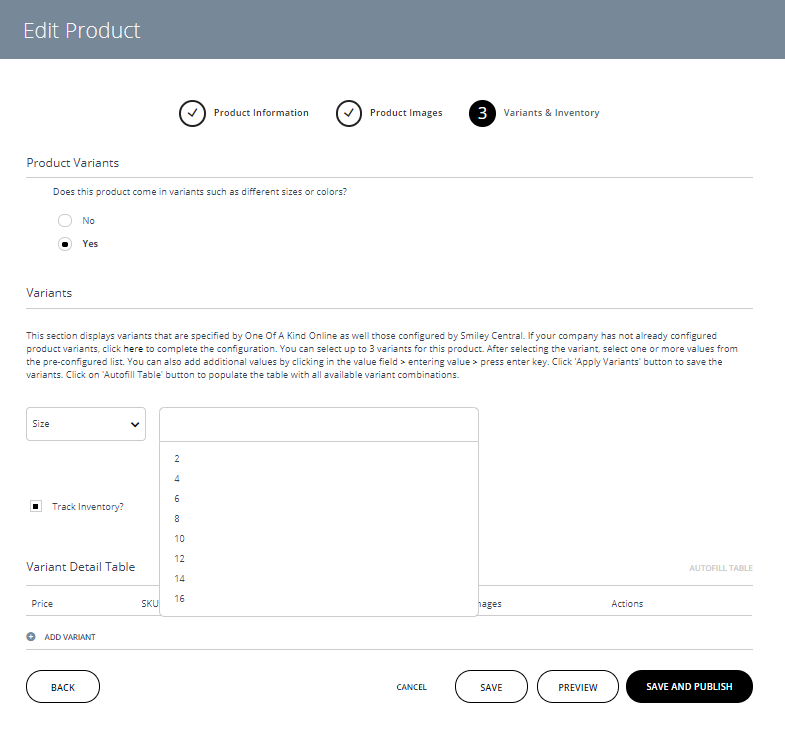
PRODUCT VARIANTS
Use this setting to create quick lists of common design features of your product, like sizing, scents or patterns. Each variant you create will be added to the Variants & Inventory step of the product creation process, so you can quickly and easily assign them to individual products. A maximum of 3 variants can be added to each product. We recommend you create these before you begin your product upload so that you can apply them as you go, rather than going back and editing to add them in.
** If you are using the Shopify integration, ensure that you have created OOAK Online variants for all variants in your Shopify shop before your initial synchronization. You do not need to populate the Variant Values, but will need to create the Variant Names. **
To create your list of variants, go to Exhibitor Profile > Store > Product Settings. Click "Add Variant" and fill out the required fields.
- VARIANT NAME
This is the category of variants you would like to create, ex. Size
- VARIANT VALUES
The values for each variant, ex. 14
Once you have created all of your variants, you can assign values at Step 3 of the product upload/edit process.
Variants cannot be deleted once they are created. If you create one you would not like to use, you can simply uncheck "Enable" so that it will not appear.
PRODUCTS VARIANTS FOR BULK UPLOAD
Variants are buying options that come along with a product. Example: If the product is a shoe, it can come in different colors, sizes and material. Here color, size and material are variant types and values can be blue, yellow for colour; 8,10 for size and canvas, cotton for material.
If your product has two buying options/variants, please follow the instructions below:
- The “parent” product information should fit on one row.
- * indicates required field
- If there are variants, enter the variant values in the rows immediately following the product row. he following required fields can be left blank.
- SKU
- Product Name
- Categories
- Brand
- Different pricing, descriptions, images and minimum order quantities can be entered for different variants. If no alternate information is included, each variant will display the parent products’ information.
CATEGORIES
Your Profile has two separate category features:
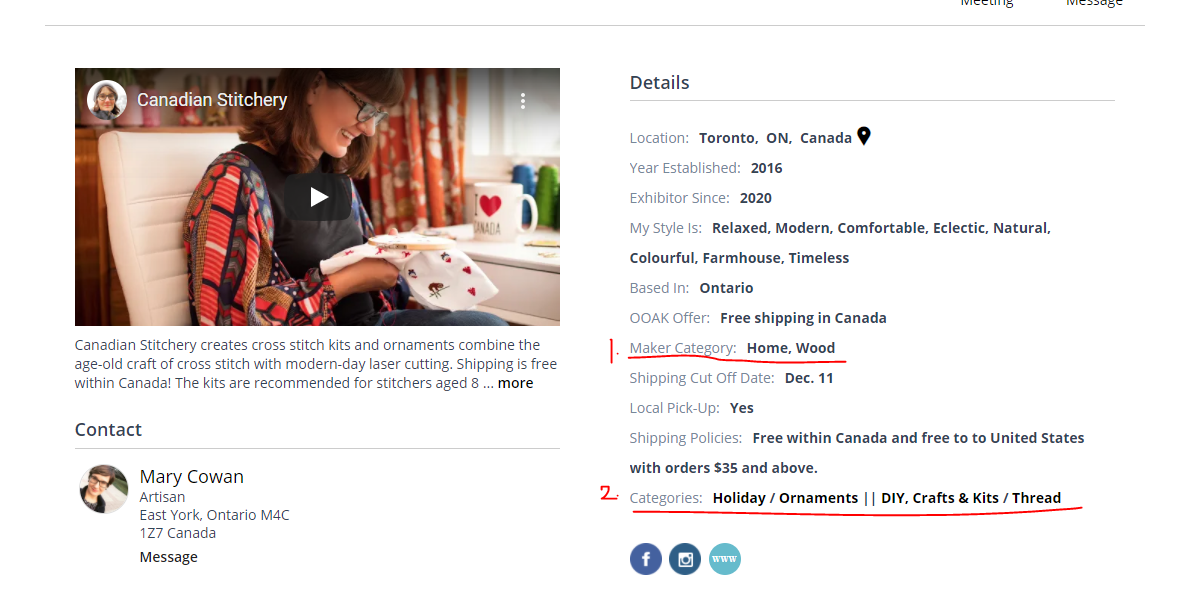
1. MAKER CATEGORIES
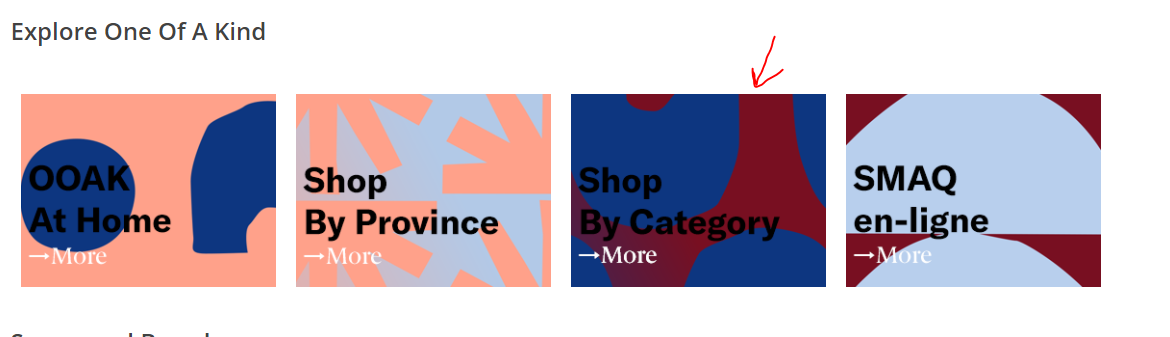
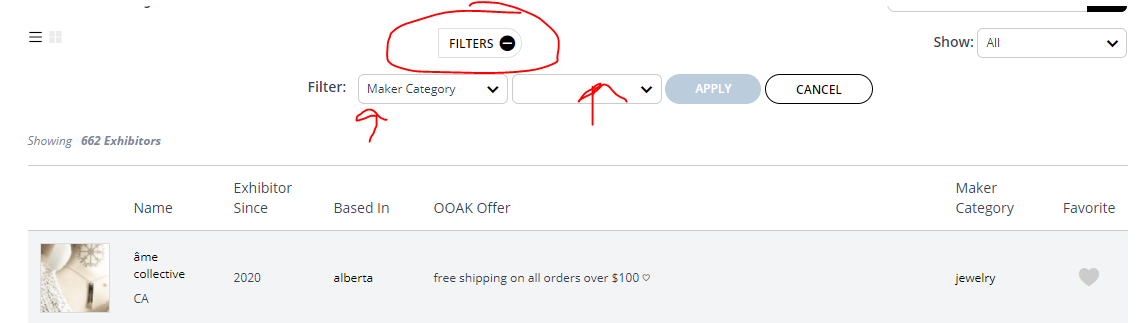
This is your overall brand category, similar to the categories we use for the Show Guide at our physical show. Maker categories can be added on your Profile page. Customers can shop by these categories via the "Shop by Category" button or banner on the Home page. Shoppers can also filter results on the Brand directory page to only see makers within a certain category. Make suse to only select the categories that best describe your brand, so that you show up in relevant brand category search/results.
2. PRODUCT CATEGORIES
These are the categories and subcategories that you apply to your products when you add them to your Store, via manual upload or the Shopify integration. You can add more than one category to each product listing by editing the product details. If you synced your products via Shopify, you can also edit your Product listing and adjust the automatic categories after the sync is done. These categories are used in search results for the Categories drop down menu and as filters on the Brand Directory and Products Page.
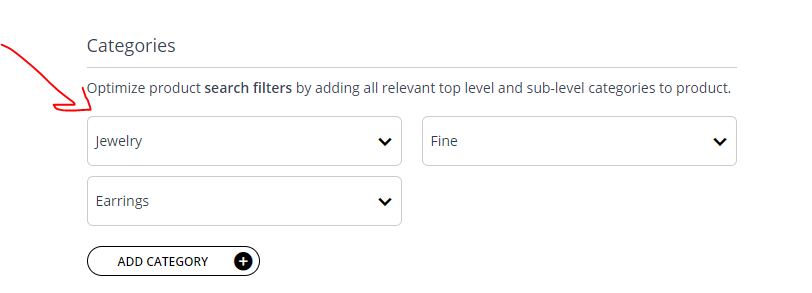
IMPORTANT: In order to make this feature effective for all vendors and shoppers, please ONLY apply categories that directly apply to your products. For example, it might be tempting to add the "Art" category to all of your products, however this tag is meant specifically for Fine Art pieces and applying it your products (ceramics, for instance) will skew the results and created a more challenging shopping experience when customers browse this category looking for Fine Art. One Of A Kind reserves the right to suppress any listings that are using product categories incorrectly.
Click here for instructions on updating your product categories.
If you feel that there is a category or sub-category that you feel would better represent your brand, please send a message with your request to support@oneofakindonline.zendesk.com. Our team will review your request and, if it makes sense, you should see the category added within 24-28 hours.
TAGS
Once you have products uploaded to your store, it is important to take the time to tag your products. If you sync your products with Shopify, you will need to go in and add tags to each product listing after you have completed the sync. If you will be manually uploading products, you can do so as your complete the upload process.
A tag is a word or short phrase, called metadata, that is attached to your product listing. OOAK Online will use these tags, together with keywords, to help shoppers find your products. Tagging products will require some time and efforts, however, it is a crucial step to ensuring better and more relevant results when shoppers search the site. So spend some time thinking about words and descriptions that shoppers may potentially use and tag your products accordingly, so that new and returning customers can discover your brand and products. Take a look at what keywords shoppers enter when visiting your own site or any other online marketplaces you participate in to get a better idea of releveant search tags.
To edit your product tags, head to your Store and click the product listing that you will like to edit. Scroll down to the Tags field and begin adding your tags. Once you are done, click Save.
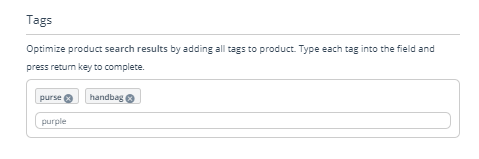
Start with the most basic terms first. Ex, if you are selling a handbag, you might apply tags such as purse and handbag. Next, you canapply tags that indicate the style of the bag, like formal or casual. You may also add tags to convey the bag’s size (small), texture/material (leather, quilted, matte), and color (black, navy). Please do not include anything not related to your products as your tags, as OOAK reserves the right to remove tags that are irrelevant.
In addition to tags, please make sure you also include relevant keywords on your product names and descriptions to maximize your return on search and MatchMaker results.